This post is also available in: zh-tw
This article walks through how to deploy Pelican to Netlify. You will know how I built this blog step by step.
Why Pelican and Netlify
As a developer, I prefer static site generators supporting Markdown. There are still many choices, including some fancy ones like GatsbyJS. Among those choices, Pelican has supports themes and plugin ecosystems so you reuse others' themes or set up Disqus easily. The most important is Pelican is written in Python, which means I might be able to fix problems by myself.
Netlify is a service that enables users to build and deploy sites in seconds. It already integrated with several Git hosting services so you can deploy your GitHub repository by a few clicks. Netlify also provides a CLI tool for CLI enthusiasts. One of the alternatives here is GitHub Pages. It looks good and supports configuring custom domains and HTTPS. I think it could be very flexible with GitHub Actions. But I picked Netlify here because I want to try something new :)
Pelican
I followed Quickstart in Pelican document to initialize the project. The pelican-quickstart command will ask you to answer some basic settings including the blog title, domain name, etc. One setting is Do you want to generate a tasks.py/Makefile to automate generation and publishing? . I selected yes here, and I'll update this Makefile in the next section. This Makefile has provided several usages, and I'll let Netlify execute make html and build static files.
You may want to customize the appearance of your blog and include some common blog features like RSS. The Pelican community already built a lot of themes and plugins. To build our blog with themes and plugins, we need to link the theme files and plugin files by specifying paths in pelicanconf.py. My solution here is to include theme and plugin code in the repository. This can be done by git submodule/subtree. I use a tool called peru to handle this. You can manage external repositories using a single YAML file. I'll include a theme repository and the official plugin repository here. I use Elegant as my blog theme, and I only pull code from the Elegant repository instead of the official theme repository to include less external code. You can read the following peru.yaml to see the usage. Also, I add peru sync to make html section in Makefile to ask Netlify to pull the latest code in the building process.
# peru.yaml
imports:
  elegant: blog-theme/elegant
  plugins: plugins

git module elegant:
  url: git://github.com/Pelican-Elegant/elegant

git module plugins:
  url: git://github.com/getpelican/pelican-plugins
  recursive: true
# Makefile
html:
    peru sync && $(PELICAN) $(INPUTDIR) -o $(OUTPUTDIR) -s $(CONFFILE) $(PELICANOPTS)
Then, we set up theme and plugin paths in pelicanconf.py.
# pelicanconf.py
...
root_path = pathlib.Path(__file__).parent

PLUGIN_PATHS = [str(root_path.joinpath('plugins'))]
THEME = str(root_path.joinpath('blog-theme/elegant/').absolute())
...
Before deploying to Netlify, I suggest you build the local site first to check. Please note that you must have at least one post in content folder to build the blog successfully. If you meet any problems here, please read the document of Pelican CLI tool. lt provides several useful options like --relative-urls or --autorealod to help users debug.
Netlify
Before setting up the Netlify project, we need to prepare two files in the project root folder for the Python environment:
- requirements.txt: for specifying Python dependencies. They are from Pelican and peru, and my
requirements.txtis generated bypip freeze. - runtime.txt: for specifying Python version. At the time of writing, the latest version Netlify supports is Python 3.7.
# requirements.txt
blinker==1.4
docopt==0.6.2
docutils==0.16
feedgenerator==1.9.1
Jinja2==2.11.2
Markdown==3.1.1
MarkupSafe==1.1.1
pelican==4.2.0
peru==1.2.0
Pygments==2.6.1
python-dateutil==2.8.1
pytz==2019.3
PyYAML==5.3.1
six==1.14.0
Unidecode==1.1.1
# runtime.txt
3.7
Then we can put all these files to a git repository on GitHub (or other git hosting services) and configure the Netlify project. I follow the guide here to set up the project using Netlify CLI.
# Install netlify cli
npm install netlify-cli -g
# Log in with Netlify. This command will open a browser
# and you need to grant access to Netlify CLI
netlify login
# Set up Netlify project
netlify init
netlify init will ask you to enter some configurations including which GitHub team to use, the site name, and the build command. We can input make html for the build command to utilize the Makefile we created in the previous section.
Extras
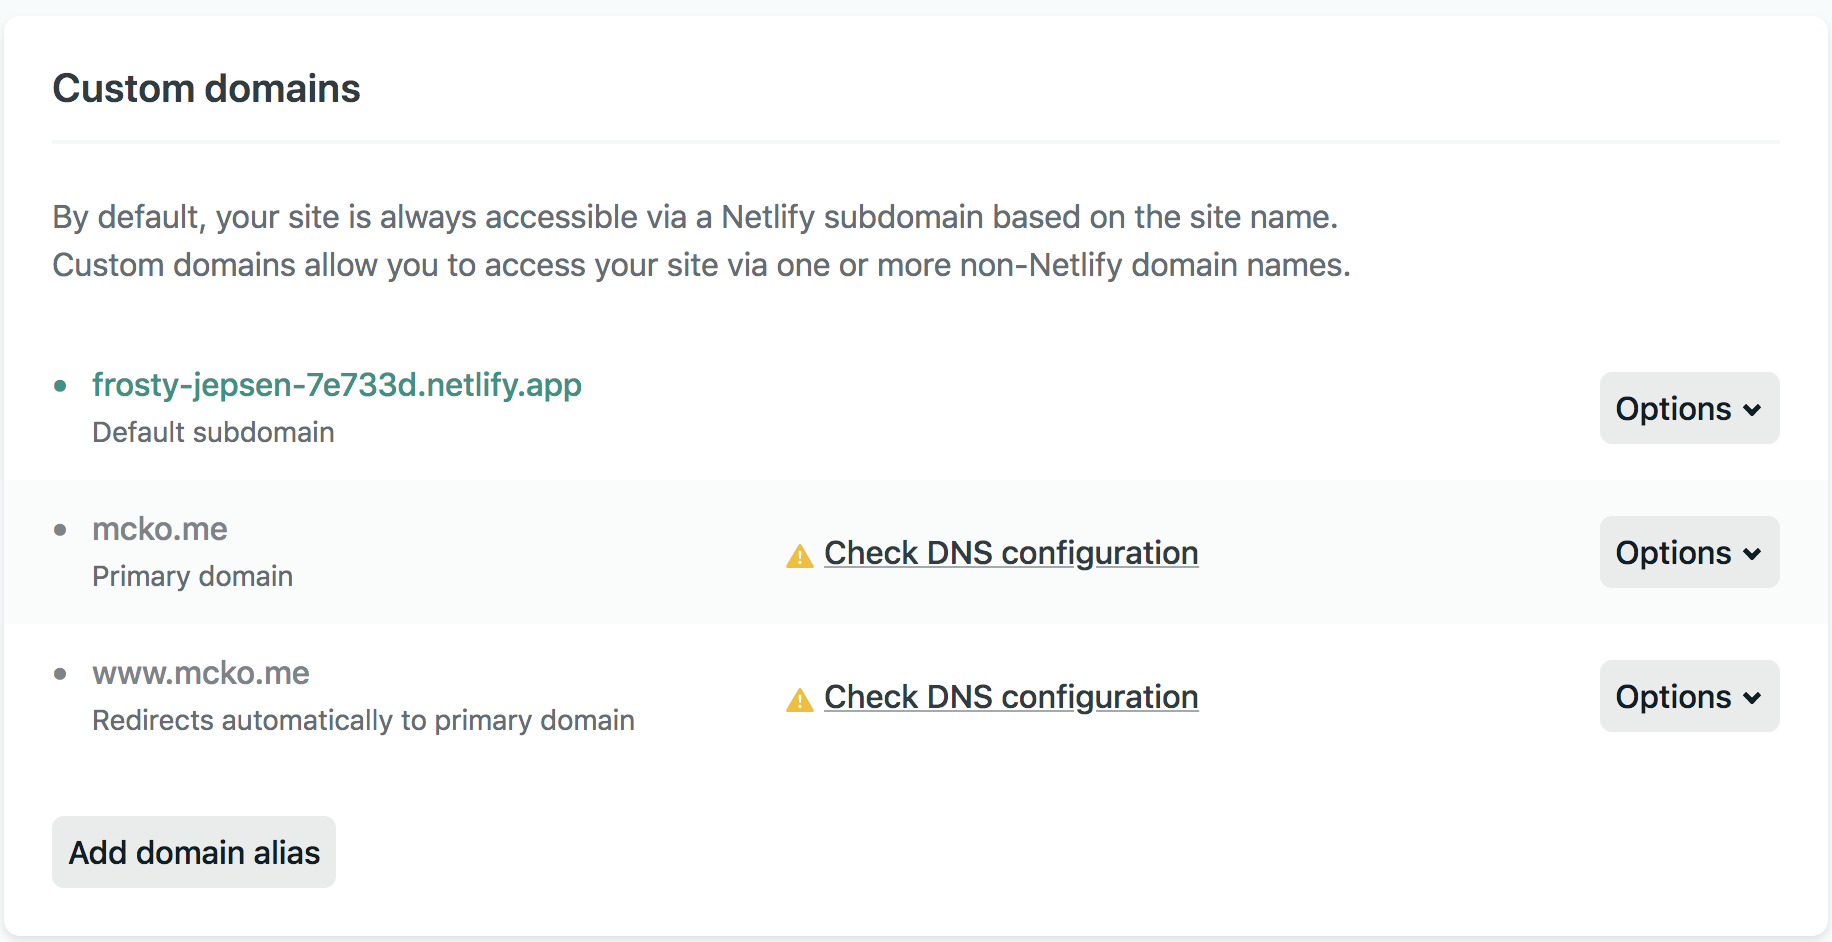
Custom domain: you can go to Settings → Domain Management on Netlify, and click Add domain alias to set up yours. The screenshot below is my current configuration.

Integrations with 3rd-party tools: for example, if you need Google Analytics, you can put your tracking ID to the GOOGLE_ANALYTICS variable in pelicanconf.py. Please read the official documentation for further details or have a look at the plugins if the Pelican doesn't support your needs natively.
All of these configurations files are put to this repository. Hopefully you can set up a new blog using Pelican and Netlify now. Feel free to let me know if you meet any problems!
Comments